Tuesday, June 30, 2020

Lemon & Strawberry Curd Tarts


The Queen of Hearts has nothing over you, once you've made these tarts!  In a cookie-like sablee crust, berries of the season  and the sharp bite of lemon you'll have to watch to make sure the Knave of Hearts doesn't steal them clean away!   Put at least two aside for yourself and the King to keep order in your castle.  Curds using various citrus and as well as other fruits are popular in desserts and particularly lush and elegant due to the high butter content.  Not a good choice for calorie counters, not a good choice for the baker feeling faint of heart, but when all the baking stars aline they are hard to beat! 

Lemon & Strawberry Curd Tarts
Tart Shells (Pate Sablee crust):
8 Tablespoons unsalted butter, room temp.
1/3 cup powdered sugar
1 large egg yolk
1/2 teaspoon salt
1 1/4 cups flour
1 tablespoon cream or milk, if needed

     -Beat the butter and powdered sugar in a mixer until creamy.  Beat in the egg yolk.  Keep mixing until the egg yolk is fully combined.  Stop the mixer and scrape down the sides and bottom of the bowl.
     -Add the flour and salt with the mixer on low speed just until the dough comes together and there is no more visible flour.  Do not overmix.  (The dough should be able to be pressed together between your fingertips and hold together.  If the dough is too dry, lighty mix in up to 1 tablespoon cream or milk.)
     -Pour the mixture onto a piece of plastic wrap and gather the dough together, pressing into a round disk.  Wrap in plastic wrap and chill for at least 1 hour or up to 2 days.
     -When ready to roll, remove dough from fridge and  let soften on the counter for about 20 - 30 minutes or until it is cool to the touch but starting to feel pliable.  Roll the dough out as thinly as possible without breaking between two pieces of wax paper, sprayed lightly with baking spray.  Cut into round circle 1 inch wider than the diamete of your mini tart pans.  (You may have to clump leftover dough back together and roll a second time to be able to make enough tart shells (makes 6 - 8 shells dependingon the size of your mini tart pans or muffin pan cups.)
     -Transfer the dough to the tart pans by cutting the wax paper around each shell, peeling off the top layer of wax paper and inverting into each tart pan.  Gently lift the edges and press the dough down into the shape of the pan.  Carefully tamp the dough down to fit snuggly in the pans using your fingers or a tart tamper.  Trim the edges by running a small knife around the top edge of the pan.  Cover tart pans loosely with plastic wrap and chill in fridge for 30 minutes.
     -Preheat the oven to 375 degrees.  Blind-bake the tarts by lining the chilled shells with parchment paper or foil.  Fill the inside with pie weights or dry beans such as pinto or kidney beans and bake until the edges just begin to brown, about 30 minutes.  Remove the pie weights.  (When using a filling that does not require baking, you must bake the crust completely first.  The pie weights (beans) help keep the crust from shrinking or puffing up.)

                                  Press and tamp crust into tart tins or large muffin cups.

Blind bake:  Fill unbaked shells with parchment paper and dry beans.


Tart Filling:  (Lemon Curd)
       3/4 cup fresh lemon juice
       1 tablespoon grated lemon zest
       3/4 cup sugar
       3 eggs
       1/2 cup unsalted butter, cubed

             -In a 2 quart saucepan, combine lemon juice, lemon 
             zest, sugar, eggs and butter.  Cook over medium-low 
             heat, whisking frequently until mixture thickens 
             enough to hold marks from whisk and first bubble 
             appears on the surface - about 6 minutes.  Remove
             from heat and place in a jar or bowl, cover with
             plastic wrap and chill until ready to use.

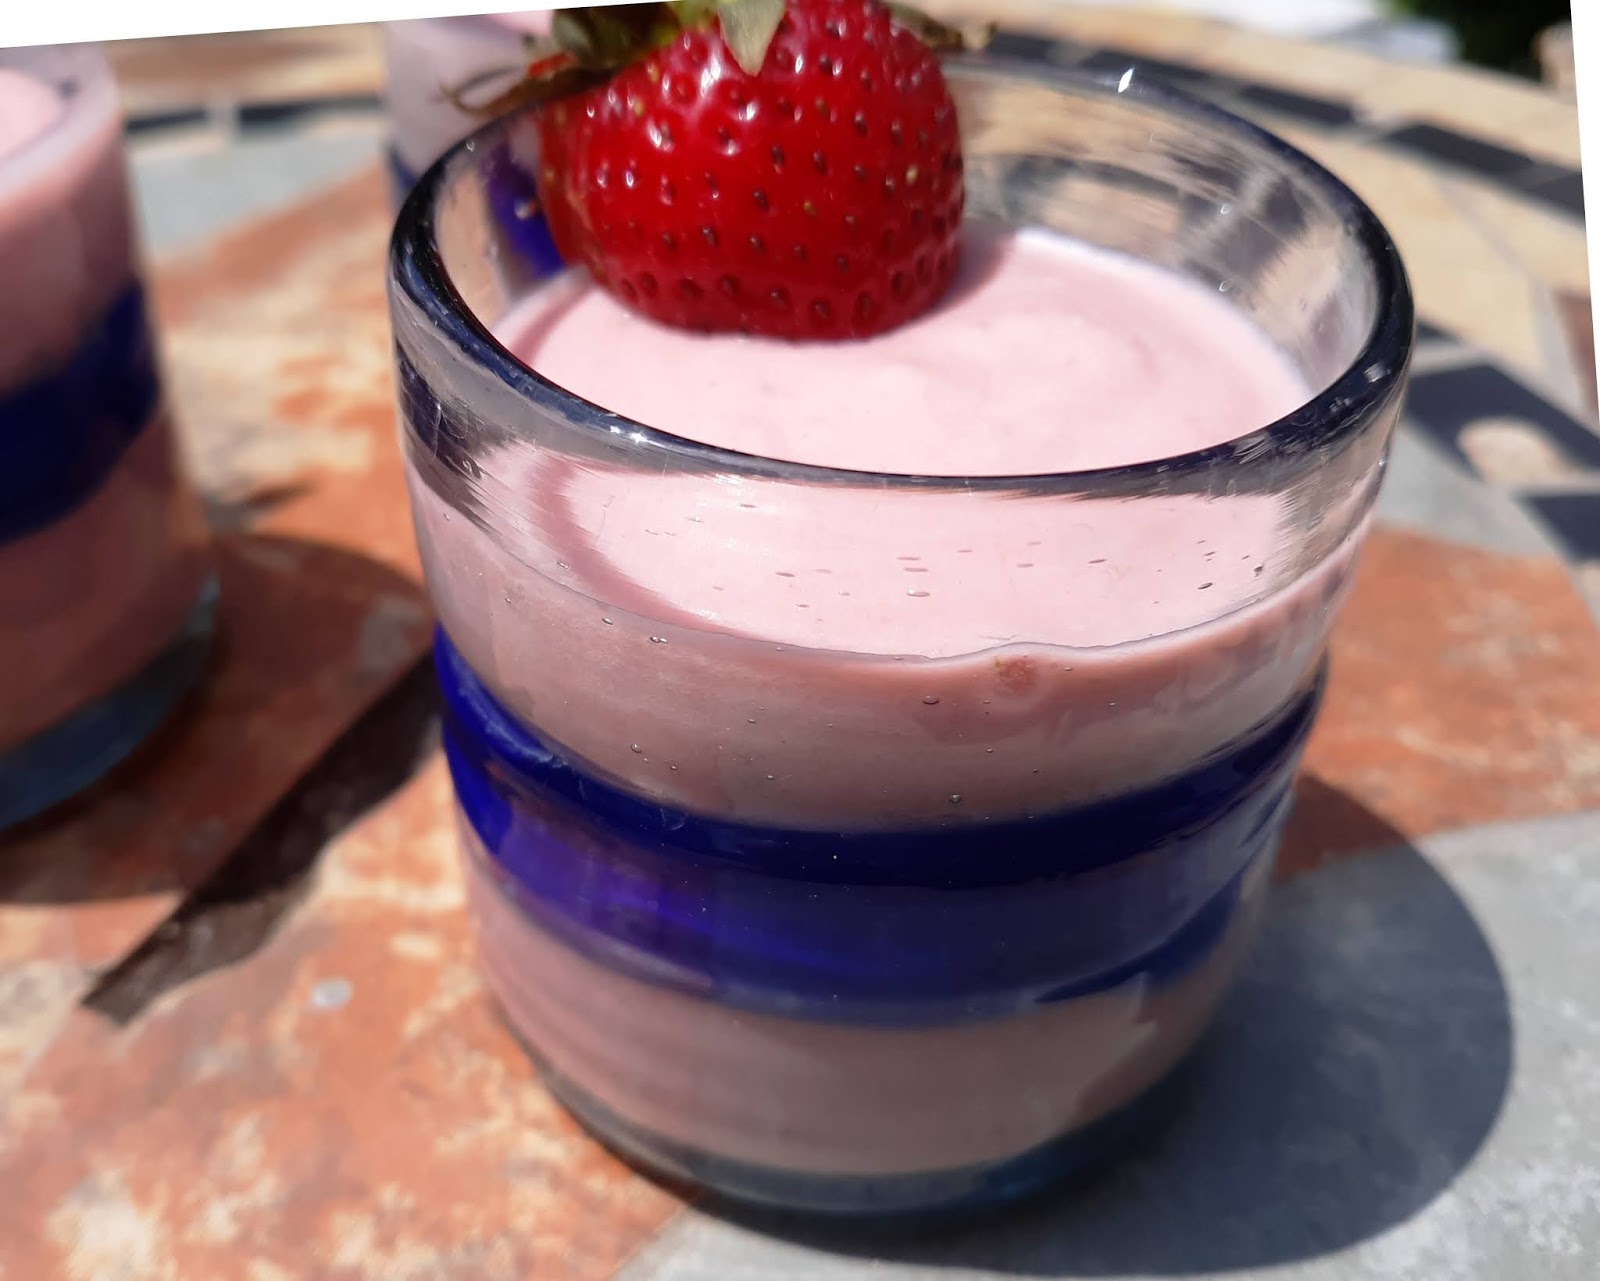
Tart Filling (Strawberry Curd)

       Follow same recipe for Lemon Curd, but use 3/4 cups 
       fresh strawberry puree instead of lemon juice.

To Assemble:

            -Fill tart shells 1/3 full with strawberry curd.  Spread
       1 1/2 tablespoons lemon curd over the strawberry curd 
       layer. Fill the rest of the shell with another layer of 
       strawberry curd.

             -Pipe sweetened whipped cream around the edges of 
       the tart in a decorative pattern, (I add about 1/4 cup of 
       leftover strawberry curd to the cream at the end of 
       beating it for more strawberry flavor and a pink 
       color.) then place a strawberry half and a sliver of 
       lemon in the middle.  Chill completed tarts several hours
       until ready to serve.


PERSNICKETY NOTES:

**I use my large muffin cups tray to make my tarts rather than tart pans.
   Either way is fine but the smooth sides the muffin cups provide are perhaps 
   easier than the fluted sides of the tart tins.  And the muffin cups hold more 
   filling!

**To make strawberry puree, place 1 cup fresh strawberries with stems 

    removed in blender or food processor until smooth.

**Not-quite-as-good SHORTCUTS!  If in a hurry or just don't want to make 
   everything yourself there are a couple of good substitutes:
                  -Use a store-bought lemon curd.  Dickinsons' brand is a good one.
                  -If making the sablee crust sounds like more than you would like to
                    take on, purchase pre-made pie crust from the freezer section and 
                    roll out for the pastry shells as described in the recipe above. (Trader 
                         Joe's and Pillsbury make frozen dough that you can roll out.)
                 -This recipe can also be made into one large 9 inch tart, which makes it
                    faster and easier to assemble.

**The pate sablee is so wonderful you must make a point of trying it one day

    when you havethe time to bake and want to create a tart crust as the
    European's do!

**Easy on the lemon curd!  The bright, vibrant lemon flavor will overpower any 

     other berry curd it is paired with so be sure to add just enough lemon curd in
     the middle of the tart.  The amount listed in the recipe insures you will still 
     be able to taste the much more delicate flavor of the strawberry as well.

Tuesday, June 23, 2020

Southwest Grilled Cheese Sandwich


      Credit for these wonderful sandwiches must be given to the chefs at "Meltz" a small establishment behind a gas station, in Coeur d'Alene, Idaho.  Because it was highly rated we visited while on a family reunion in the area and then ate there at least 2 more times during the week.  Their extreme, over the top grilled cheese sandwiches are like nothing you've ever eaten before and for me, it couldnt' be a once in a lifetime opportunity.  So for the past 8 years I have been working on perfecting one they called, "Border Patrol" which was my favorite.  Meltz creative genius created other variations including the Pot Sticker (Asian influence) and their newest, the Poutine (a nod to the Canadian cheese curd dish).  Check the menu at this link:  https://www.meltzextreme.com/menu
       At any rate, I didn't want to duplicate their's exactly and so made a few changes so I can at least call them "a chip off the old block" - and thus the name "Southwest Grilled Cheese" with most of the same great flavors but just a bit milder.  I added grilled, spicy chicken to make it a complete meal and used the milder green chile.  
        I have served these with another option or two, always piled high with ingredients that go well together,(some you'd have to taste to be impressed).  Not only are the sandwiches scrumptious but then to add another level of intensity and depth, you can order various dipping sauces on the side.  My favorite was the artichoke ancho pesto but ancho can be difficult to find so I switched it up a bit to create "Artichoke Chili Sauce".
        A great idea for a "make your own grilled cheese sandwich bar" - have the varieties of fillings and spreads available, stack' em high, then don't skimp on the butter and Parmesan cheese.  But let someone with a deft cooking hand take on the cooking and flipping!  Most probably...you!


Southwest Grilled Cheese Sandwich:

8 slices thick, sturdy country white bread or Texas Toast
8 chicken tenders, battered and fried with Taco seasoning 
      mix, or roasted chicken shredded, fried in 2 tab. oil with 
      Taco Seasoning mix (to taste)
1 can whole green chiles, cut into thin strips, or 2 poblano 
      peppers, roasted and skins removed, cut into thin strips.
12-15 fried battered onion rings (frozen and fried)
8 strips bacon, crisply fried
16 ounces sliced or shredded pepper jack cheese or Colby 
       cheese
2 heads roasted garlic
Ranch dressing

          -Lay bread slices out on counter.  Spread each piece generously with Ranch dressing. Lay or sprinkle a handful of cheese on bottom slice of bread, generously covering entire surface.  Lay 2 chicken tenders sliced thinly, on cheese, then 2 strips bacon, followed by the green chile strips, then paste of 
4 -5 cloves of roasted garlic, squeezed from skins, followed by 3 -4 onion rings.  Top with more cheese.  Place top bread on sandwich.  Press down firmly.  

           -Butter the top piece of bread on the outside generously and sprinkle with Parmesan cheese.

          -In large heavy skillet, heat 2 tab. oil and place 2 sandwiches butter side down in skillet.  Cover and cook over medium heat about 5 minutes, until butter side is browned 
and cheese begins to melt.  With spatula push down firmly on sandwich, butter the top side generously and sprinkle with Parmesan cheese and carefully turn sandwich over.  Replace 
lid and cook another 5 minutes until the bottom is brown and crispy and cheese is melted.  

          -Remove from pan and let rest for 2 -3 minutes then
slice diagonally and serve immediately with artichoke and chili dip for dipping.

Artichoke & Pepper Dip:
1 teaspoon chopped chipotle pepper in adobo sauce
1 tablespoon minced sun-dried tomatoes in oil
4-5 canned and drained artichoke hearts
1 large clove garlic, minced
½ cup mayonnaise
Salt and pepper to taste

-Blend briefly in food processor or blender and taste for seasoning.  Chill.


Layer bottom bread with ranch, cheese, chili slices,
chicken slices & onion rings


Place cheese slices or grated cheese on top.


Generously butter and parmesan cheese top slice.


Apply slight pressure to sandwich and place
buttered-side down in oiled skillet.


Enjoy a delicious bite of this deeply satisfying grilled cheese sandwich!


PERSNICKETY  NOTES:

**To roast garlic, peel the outer skins from a head of garlic, leaving the head intact with the skins on each clove.  Cut off the top tips of the head of the garlic exposing each clove.  Place in a small overproof dish or ramekin and sprinkle with 1 tab. oil.  Roast in 375 degree oven for about 30-40 minutes or until a knife pierced in a clove, goes in easily.  Remove from oven and let cool about 10 minutes.  Take each clove and squeeze on the bottom end so the cooked center pops out, into a dish.  Mash the roasted garlic pulp with a fork.

**Taco Seasoning:  You can use prepared taco seasoning mix for the chicken or make your own spice combination of 2 tab. chili powder, 1 tab. cumin, 2 teaspoons garlic powder, 1 teaspoon onion powder, salt and pepper, to taste.

**Battered Fried Chicken:  If you prefer to batter and fry your own chicken, combine 3/4 cup flour with 1 egg and 1 1/2 cups milk or buttermilk, 2 teaspoons salt and 1/2 teaspoon pepper.  Mix in a medium bowl with a whisk until smooth.  Add chicken tenders and let sit for 30 minutes to an hour.  Heat 2 tablespoons oil in large skillet.  Lift each chicken  tender from batter and let excess drip off  for a moment then dredge in fine breadcrumbs on both sides.  Fry in oil on each side for about 3 minutes per side, until brown and crispy.  Remove onto paper towels and let sit for 10 minutes.  For sandwich, cut each tender in half  lengthwise.


Thursday, June 11, 2020

Strawberry Soup


          Strawberry Soup - as my mother called it, is a blast from the past!  For patio barbecues and backyard picnics, she whipped up these delicious, smooth as silk cups of nectar to be served with cake or cookies.  This retro recipe might be viewed as a precursor to smoothies and mousse and things of that nature that had not yet made their way to inspire the human mind.  But it's a super easy and lovely way to visit the past when cooking was simpler, desserts faster but tastes every bit as able to appreciate a lovely sweet & creamy drink.  I know mine did!
         Try the original version and then if you like, modernize it by adding a tablespoon of balsamic vinegar, a few leaves of fresh basil or mint or freshly squeezed lemon juice.
         But most importantly,  remember this recipe for when you're in a hurry and enjoy the simplicity of  blending berries, sugar and cream together & drinking!
        Mom certainly was heading in the right direction by concocting dishes ahead of her time.  This creation must have given birth to the endless combination of smoothies and mousses we enjoy routinely today.  How Mom would have loved them!


Strawberry Soup
1 quart fresh strawberries, washed and hulled
       (or 1 lb. frozen unsweetened strawberries)
1 1/3 cup heavy or whipping cream
1/3 - 1/2 cups granulated sugar, to taste
2 tab. fresh lemon juice
(optional:  1 tablespoon balsamic vinegar, 8 fresh
         basil or mint leaves)

          -Place cold strawberries in blender.  Add sugar

and fresh lemon juice (and optional ingredients).  Blend on high speed until mixture is very smooth, about 2 minutes.  

          -Add cream and blend on medium-high speed until mixture becomes slightly thickened.  Taste for sweetness.  Add more sugar if desired and blend on low briefly to allow sugar to dissolve.


          -Serve in small glasses.  Garnish with strawberries cut in half, leaving stem in tact.  Slide strawberry onto the edge of each glass.   Serve immediately or keep up to 30 minutes, chilled in fridge.    Serves 6 - 8


    Garnish with strawberries on edge of glass.

                        
                                                Very Berry and velvety smooth refreshment!


Saturday, June 6, 2020

Gougere with Ham & Mushrooms


       Gougere is the French name for pate a choux with cheese in it and appears as little puffs as light as air, buttery and cheesey.  Pate a choux (not to be confused with the much more difficult puff pastry) is the French pastry that is used for cream puffs and eclairs.  You know - the light airy eggy dough that puffs to create a whole in the interior just waiting to be filled with cremes and savories alike.  My granddaughter and I watch cooking shows together and recently upon a contestant admiting he had never made pate a choux we both gasped and said, "What is he doing on a baking show if he's never made pate a choux!"  Well she hadn't either so the next day we made it, even adding the lovely cookie top, craqueline.
         Having never made it before, one has a right to be concerned as you must know a few basics to have your dough puff every time.  I once had a student ask me in a cooking class why his puffs hadn't puffed to find out that he had mixed the dough with eggs in a blender.  Yes, we want to add air to the dough, but not beat it out of every molecule!
        There are a few basic tips to keep in mind:  
        Follow the directions meticulously! and:
            -after you have dumped the flour into the water & butter, beat and stir for
             about a minute after over the heat, until the dough comes away from the 
             sides of the pan and forms a rough  ball in the center.
  
            -cool the mixture down before adding the eggs so it doesn't scramble 
             them.  You can either let it run in a mixer on low for a couple of minutes
             or set it aside and stir occasionally for 5 minutes.

            -add the eggs one at a time, beating well after each and until each is well
             incorporated. (Yes, this may be done in a mixer - you don't have to use 
             the traditional method which requires a wooden spoon and powerful 
             biceps to have success.)

           -when making puffs, prick the cooked pate a choux with a knife to let the 
             air escape and turn off the oven, leaving the door slightly ajar by placing 
             a hot pad or a wooden spoon in the frame of the oven door. Leave for 
             about 30 minutes before filling. (This step is not necessary for this
             particular recipe!)

          Below is a delicious, elegant, savory rendition of gougere which is a perfect dish for a brunch, for company and for anyone with a fine palette!

Gougere with Mushrooms and Ham

Pate a Choux:
      1 cup all purpose flour
    1 cup water
    1 teaspoon salt
    1/2 cup butter, cut in 4 pieces
    4 eggs
    1 cup shredded sharp cheddar cheese
    1 teaspoon smoked paprika

Filling:
    4 tablespoons butter
    2 medium size onions, chopped (1 cup)
    1/2 large red bell pepper, thinly sliced
    4 green onions & green tops, sliced
    1/2 pound mushrooms, sliced
    1 1/2 tablespoons flour
    1 teaspoon salt
    1/2 teaspoon ground pepper
    1 teaspoon chicken bouillon paste or bouillon square
    1 cup hot water
    2 large tomatoes, peeled and quartered
    6 ounces cooked him, cut into thin strips
    2 tablespoon shredded Cheddar cheese
    2 tablespoons chopped parsley

    Directions:
        To make the filling:
             -Melt the butter in a large skillet.  Saute the onion
              and red pepper strips until soft but not browned. 
              Add the mushrooms and continue cooking about 2 
              minutes longer.

             -Sprinkle with flour, salt and pepper; mix and cook 
              an additional 2 minutes.  Add the chicken bouillon 
              and water and mix well.  Bring to a boil, stirring
              constantly and simmer over medium-low heat 4 
              minutes.

             -Remove sauce from heat.  Cut each tomato quarter 
              into 4 strips and add to the sauce with the ham 
              strips and green onion.  Taste and add additional 
              seasoning if desired.  Set aside.

       To make Pate a Choux:
             -Heat the water and butter in a large saucepan until
              the butter melts and mixture begins to boil.  Stir in 
              salt.

             -Dump the flour into the boiling mixture and stir
              vigorously until mixture forms a ball and pulls away
              from the sides of the pan - about 1 minute.  Remove
              from heat.

             -Scrape mixture into a mixing bowl, fitted with a
              whisk and mix at low spead for about 3 minutes to
              allow to cool a bit.  Turn mixer to medium-high and 
              add eggs one  at a time until well incorporated.  
              Beat mixture for about 1 minute after the addition of
              each egg.  (Alternately you can use the traditional
              method of beating the choux with a wooden spoon,
              beating well after the addition of each egg.) In either
              case, it is very important to beat well after each egg. 
              This is what allows the choux pastry to puff when
              baked. Stir in the shredded cheese and paprika.

     To Assemble:
             -Butter a 10-12 inch rectangular ovenproof baking 
              dish. Spoon the pate a choux around the edges of
              the dish leaving the center open.  Pour the filling in 
              to the center space.  Sprinkle all over with the 2 
              tablespoons of cheddar cheese.

             -Bake in a 385 degree oven for 40 minutes or until 
              gougere is puffed and brown and the filling is 
              bubbling. Sprinkle with parsley and serve at once cut
              into squares with an edge of the pastry (Cut 
              lengthwise in the center and then across 4 times to
              create 10 pieces.)


Ingredients for ham and mushroom filling.

Saute vegetables and create sauce from tomatoes and broth.


Spoon choux around edges of dish and place filling in center.

 Baked Gougere with mushrooms and ham!